Pages

Saturday, June 25, 2016

Retaining wall and more tunnel work

Progress has been a bit slower than expected recently due to back issues, hence the lack of a post in the past week. But thanks to ibuprofen, progress has not stopped altogether.

The biggest accomplishment this week has been alignment of the sub-roadbed and building a retaining wall along the tangent north of the Western Redceder. Once again I've found another use for my pile of bricks, this time planting them vertically at a slight angle back from the road.


Here's another angle looking at the backside of the retaining wall prior to backfilling.


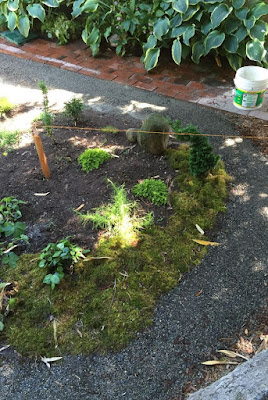
And here's another picture showing the finished product, after the wall has been backfilled with topsoil and landscaped. The roadbed is not complete -- I'll need to add about two inches of crushed gravel to bring the roadbed up to the grade line. I foresee lots and lots of tamping in the next few days!


I also continued work on the tunnel this week. I added more bricks to the sides of each portal to provide more support for the facade and secured them with coarse gravel. Once everything was in place I secured the facade onto the bricks using foam board adhesive.


Here's a photo of the completed south portal. In this photo you can also see that I covered the tunnel with black plastic to reduce the amount of water than goes into the tunnel, as the concrete blocks on top have thin gaps between them. I do like the sound of a dripping train tunnel as much as the next person, but I'd still prefer to have most of the water channel around it. Another thing you might notice is that the plants are starting to move around to new homes.


I need to make a decision on the exact placement of the bridge so I can start working on foundations. I'm using some bricks as a temporary support as I try to determine where the bridge should go and how long the approach on each side should be.


And finally a picture of a BN consist out for a test run. The locomotive was in the shop this week for some wheel cleaning and a bit of electrical work. I can't wait to convert this one to battery power so I don't have to worry about picking up power from the track any more!


Thursday, June 16, 2016

Coupler upgrades and clearing more right-of-way

A shipment of Kadee couplers arrived yesterday so today I had most of my rolling stock in the shop for coupler upgrades. All of my equipment now has Kadee G scale AAR Type "E" couplers and this is what I'll use consistently going forward. Also, two cars that were still using plastic wheels received new steel wheels.


After car upgrades were complete, I put all my rolling stock behind the UPS NW2 for a test run.


I'm expecting another shipment of track tomorrow. So in preparation I cleared out the right-of-way through the iris bed around the Western Redceder. It's sad to see so many iris go, but most of these will be going to Dawn's yard so I'll still be able to visit them. If weather and time permits tomorrow, I should be able to put down the roadbed after I pick up some more gravel at Burien Bark.


Here's another view showing the loop the track will make around the tree. A lot of iris had to be removed, but the yuccas were not touched.


This picture shows what will likely be the final alignment of the high line. I think the eastern bridge foundation will be right around where the rock in the foreground is. Everything beyond that will be filled in with dirt. The high line will cross the tunnel about two inches above the tunnel roof.


And speaking of bridges, look what arrived late this afternoon. It's beautiful!


Finally, here is a short video showing the train during the test run.


Wednesday, June 15, 2016

Tunnel construction

I did not write a post this weekend as I had no update other than to say that phase 1 is complete and trains are running. The remaining track arrived on Friday as expected and I put it in place on Saturday morning. After a couple hours spent on ballasting and cleaning I had trains up and running by Saturday afternoon. My BN consist, still with mismatched couplers, had no issues staying together and managing the curves. And I forgot to take pictures!

So this week attention turns back to phase 2 construction. In the last post I mentioned finalizing tunnel alignment. Once I had the exact location determined, I put down 3/4" gravel and tamped it down to form an even foundation, then put the bottom row of bricks in place, also using the 8" bricks as spacers as they are the width of the tunnel.


The last few days I've been working on a portal for each end of the tunnel. The last blog post showed a drawing of the south portal on XPS (extruded polystyrene) prior to any cutting and carving. And here is a picture of those portal pieces carved, cut, sanded and ready for their first coat of paint


Here the finished pieces are shown as they'll appear at the south portal. I'm very happy with how these have turned out. I used the method described by Mike McLaughlin of the Mt. Meterbox and Bare Sands Railroad. His video on YouTube provides step-by-step instructions; click here to see it.


Using the portal pieces as guides, I placed bricks behind them then used stakes to hold the bricks in place.


Now for the fun part...building a masonry tunnel. I've never laid bricks before and I'm sure my resulting effort would never pass a home inspection, but fortunately I'm not worried about holding up the foundation of a house. After the third layer of bricks I stopped to check for alignment and ensured everything was still level.


After the fifth layer of bricks I stopped to clean the tunnel interior of mortar than had fallen in. I then put down a layer of 1/4-minus and tamped it into place. My 8" tamper fit perfectly within my 8" tunnel walls as planned.


For the roof I decided on 2" concrete blocks. I bought these at Home Depot because they were labeled as 8" x 16" which fit the dimensions of my tunnel perfectly. But I never measured the blocks so I didn't realize that neither of those dimensions were correct until I started putting them into place. My mistake.


As the concrete blocks were less than 8" wide, I now had a roof gap at the north end of the tunnel of about 2". So as a workaround I turned two bricks on their sides and put some mortar between. Unfortunately this will now be a little taller than the portal I created, so I'm not sure how I will hide it. I might paint the brick to match my portal. Or if it doesn't look good I may knock it out and try something different.


The tunnel now needs to sit for two days to allow the mortar to cure before I start burying it and landscaping around it. I'll also put track down through the tunnel once it arrives this week.

After all this work I still have a big pile of bricks! What will I build next?


Thursday, June 9, 2016

Roots are out and track is going in

The past three days have seen a fair amount of work. I continued to dig and remove rocks along the fence line. Yesterday, chainsaw in hand, I went to work on removing some of the tree roots that were blocking the right of way.


As I don't want to cause too much damage to the tree, I've decided to elevate the roadbed along the fence line above what I had originally planned. I'll do this by starting the incline about 12 feet further east. As a result, the roadbed will now pass over some roots rather than cutting into them. And because of this change I've also decided not to build a tunnel here, but instead put the roadbed in a trench which I think will look better. My planned grade here was 2.5%, but I think it might end up being 3.0% -- I still need to do some more measurements.

Some of the concrete blocks I've dug up have already been repurposed as a retaining wall. This wall will help hold back that the "mountain" that the tunnel will be passing through.


Some of the track I ordered arrived today but not everything I need for my loop. Hopefully the rest should be here tomorrow.


With the track that did arrive I was able to lay it out and validate my roadbed is positioned correctly.


I could also at this point determine exactly where my tunnel will go.


And finally I ballasted some of the track where I'm confident the track is correctly placed and will not need to move again. Here's an overview showing today's progress.


Another thing I'm working on is a portal for the tunnel. This is my second attempt -- my first attempt went horribly wrong when the paint I applied had a chemical reaction with the extruded styrofoam base. This time I will be testing my paint before I apply it!


Monday, June 6, 2016

Track removal and roadbed preparation

I did a lot of work in preparation for my new track arriving today. First, I ripped up the temporary track work. Some of this track will be reused immediately, some will be used in the future during track expansions, and the rest will be stored until needed or possibly resold.


It was a bit dirty and in need of cleaning before being stored away. Fortunately I have an automatic track cleaner which can hold about three dozen pieces of sectional track per load. Look how shiny that brass is now!


With track out of the way, I surveyed again and adjusted stakes as needed.


And as I had done last time, I put down a layer of quarter-minus gravel and pounded it into place with my 8" tamper. I then wet it down and tamped some more. Next I went around the roadbed with a level to look for uneven spots or slope changes, raising or lowering the trouble spots as needed. Then more water and more tamping.


At this point the roadbed was ready to lay down my new track. I also adjusted some of the bricks to even out the walking path. I still haven't put sand down to lock them into place as I'm waiting for settling to occur, which I'd rather fix now than later.


It was also at this point in the afternoon that I checked my email and realized the track would not be coming today! I had misread and confused email from two different companies, so the track that I thought was arriving today was not shipped until today. And what was arriving today instead was my 30 degree crossing, which I had ordered from a different company. I still need it and I'm glad it's here but it won't do me much good until the rest of the track arrives.


So, sadly, no running trains this week. My UPS train is sidelined until UPS delivers my track.

Friday, June 3, 2016

Construction continues on new lines

Work has been progressing the past two days along the PE&A right-of-way.


I've removed all of the concrete blocks that were buried along the fence where tunnel no. 1 will be built. The largest one, which was blocking the right of way, probably weighs over 100 lbs. While the big rocks are out of the way, I still have a number of large roots to remove before I can start laying down foundation for the road bed.


I also surveyed and staked out the loop around the big tree (western redceder, Thuja plicata). I then strung mason line between stakes to show where the two long tangents will be, the first along the fence line on the incline, the second one about 12" over the lower track loop. The "high line" will cross over the lower track loop in three spots. For more perspective see my previous post that includes the site plan.


Here's another view looking the other direction. My goal is to keep the incline along the fence to no more than 2.5%. I haven't decided how long the tunnel will be -- likely it will be about 5-6 feet and end just before the track goes into the curve.


As the National Weather Service has issued a Heat Advisory for the next two days, I don't think I'm going to get much more work done this weekend. But Monday should see cooler temperatures, just in time for the arrival of my new track on Tuesday.


Wednesday, June 1, 2016

Starting work on track alignment upgrades

I've started work on the next phase of development, replacing the temporary track with a permanent 42' oval, as well as adding a crossing and turnouts in preparation for what will be coming in the future. Track has been ordered and will hopefully be here by the beginning of next week. In the meantime, I'm preparing the road bed but not yet ripping out the existing temporary track.

I decided on a final alignment of the oval today, a slight adjustment from what I originally had planned, and outlined it using wooden stakes. There was a small amount of turf and plant removal needed to clear the area.


In the area of soft soil, I put down a floating foundation of bricks which will help keep the road bed stable and level, just like I did with the temporary track. In the photo below, note the difference between the existing 5' diameter curve and the future 8' diameter curve.


The bricks in the photo below provide a rough outline of where tunnel no. 2 will be built; it probably will be about 4' in length. I won't be doing any work on this until the temporary tracks are gone. I haven't made a decision on the method of construction for this tunnel, but I'm leaning toward brick and mortar walls with a concrete lid.


A bigger challenge will be tunnel no. 1. There is a very large block of aggregate blocking the path. And once I manage to get that out of the way, I will likely have a few large roots to cut through. This will not be fun.