The trestle work is complete! The new bridge is installed, track has been put back in place and trains are running again on the PE&A.
Last weekend I finished staining the trestle. I used a very dark stain that is nearly black, as the wood used in trestles when it is treated is typically very dark as you can see in the photos below. Staining was a mess. I thought I might save time by using a sprayer instead of a brush, but in the end I think I could have done a better job with a brush, and it would have taken just as long. Glad it's done.
Then, early in the week, my long awaited bridge arrived. It arrived a couple weeks later than I originally hoped it would, but as I was a couple weeks behind with construction, the bridge was actually right on time. This weekend I installed the bridge, replaced the track, put down new ballast on the the approaches, and made some other minor adjustments so trains were ready to roll.
 |
| I've never received a trapezoidal box before. There is only one thing that could be in this box. |
 |
| My new Warren truss bridge from Eaglewings Iron Craft. It is welded steel, weighs about 30 pounds, and has a powder coat that should last many years. Most importantly, it's absolutely beautiful and puts my other bridges to shame. |
 |
| I did not think about this photo until just today, but this is essentially the prototype I had in mind. This is the Pratt truss bridge that crosses the Palouse River in Elberton. Note that it is resting on a concrete pier and beyond that is a wood trestle. See this blog post for more about Elberton. |
 |
| This photo shows the remains of the trestle approaching the bridge. Just the bents remain, and all the stringers and ties are gone so you can't walk along it. Note the very dark color of the wood. |
 |
| This is an overview photo of the complete trestle with both bridges in place. |
 |
| When I first put the new bridge in place, it was about one inch shorter than I expected, about the width of one trestle bent. I measured the bridge and it was exactly the length I had ordered. So I made an error at some point and the length of the upper trestle ended up one inch shorter than it should have. I determined the easiest solution was simply to shift the stone on the other side one inch out. Unlike the real world, in model railroading if a mountain isn't where you need it, you move the mountain. |
 |
| This is the switch at the yard entrance. I had pulled out the track here due to construction and also due to a mole, which has since been dispatched. Once track was back in place I put down new ballast and worked it in between the ties. |
 |
| Next I put all the track back in place on top of the trestle. I will secure the track using screws to attach some of the ties to the middle bent, but first needed to run some test trains to make sure the track was aligned. Most brands of track have small pre-drilled holes in some ties for this purpose. |
 |
| Here's a picture of the complete trestle with track in place, prior to the first train run. |
 |
| The first train across the new bridge. |
 |
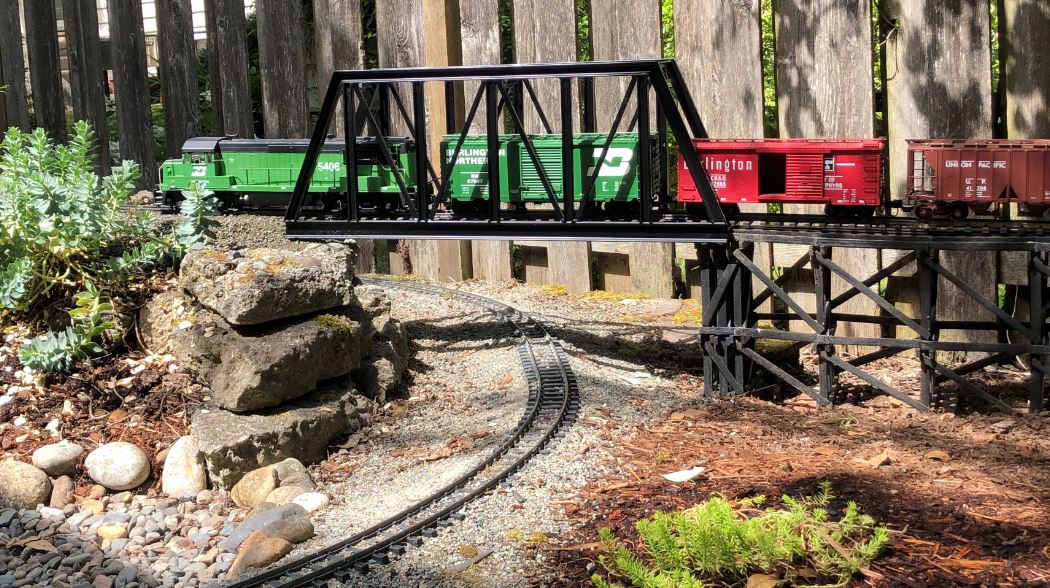
| Another train I was running today. It's been two months without service, so there's a backlog of freight to haul. |
 |
| The new bridge provides enough clearance for overheight cars, taller than anything I likely will be hauling on my railroad. |
 |
| One more photo of the train making its way up the grade. |
 |
| Another new dahlia this year, definitely a keeper. Although I'm not a fan of the lacinated petals, I really like dahlias with an ombre effect like this. |
 |
| It must be midsummer, as the gladioli are opening |