Pages

Monday, May 5, 2025

New retaining wall and some more trestle repairs

My test runs pointed out a couple issues that needed fixing including a low spot on the mainline where I have a switch. I need to raise this as it's too low and results in a steep grade on the reversing loop.


A view of the problem area. I tried raising it up by piling up a lot of gravel which helped but I decided it wasn't enough.


Another view of the same area showing the low spot. The plant on the right is a native roundleaf alumroot (Heuchera cylindrica) which I added last year and it should be in bloom soon.  


To raise the track further, I decided to build a retaining wall here because of the slope. I dug out a trench along the track where it will be placed.


This new retaining wall matches the one I made earlier along a spur track, using three stakes to hold it in place. I just need to very gently and evenly pound the stakes into the ground.


Oh no! I wasn't careful enough and it got unbalanced and one section split apart.


No worries, once I leveled out the wall I glued the two pieces that had popped out back into place. Just need to let this set for 24 hours before I backfill the wall.


The partially finished wall in place. The top of the wall is higher than track level now but will be about even once I add backfill behind the wall and raise the track.


I also needed to do a little more trestle repair. I did most of the trestle repairs a few weeks ago, but a couple beams popped out of place this week after being hit by an errant Chuckit ball. 


Another quick and easy bridge repair. Chuckit ball to blame here as well.


The next day I backfilled the retaining wall, aligned the track and set it in place with ballast.


I then finished work on the spur that serves as a reverse loop for the mainline.


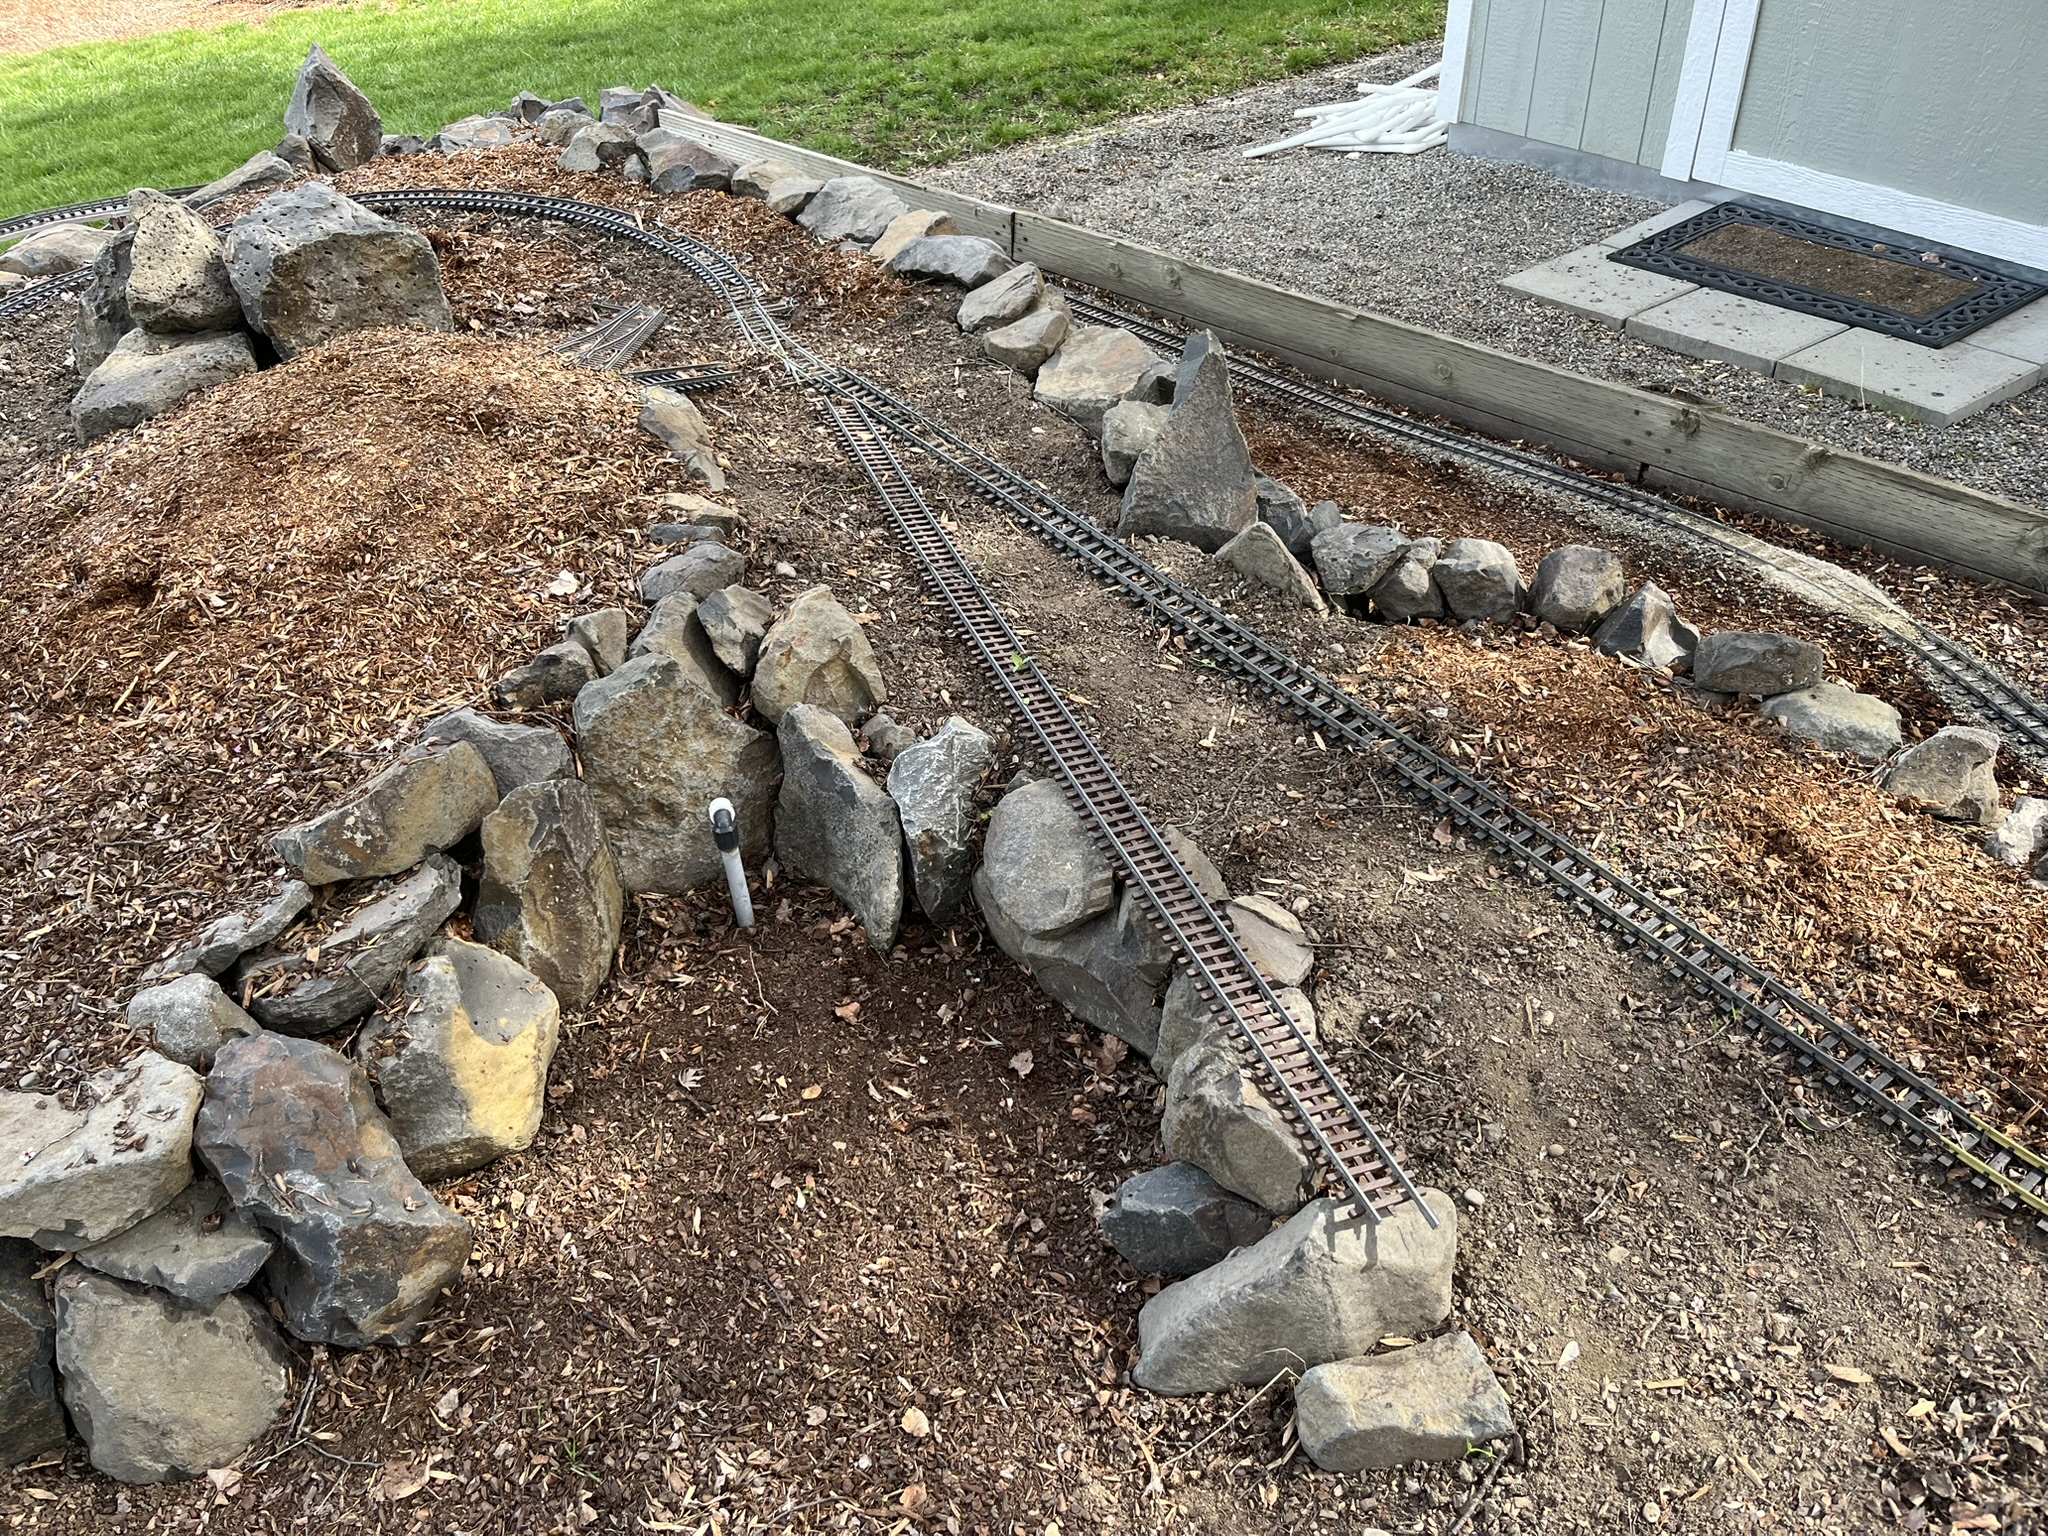
This is the area I'm working on next. I'm happy with the positioning of the connecting track between the mainline and the upper loop.


This switch is the connection between the upper loop and the connecting track.


One side of the upper loop will head out over a trestle here. These rocks are in the way. I'm not sure why I built this ramp so wide, so I think I'll cut back into the dirt and push the rocks back closer to the connecting track.


The upper loop will have two bridges over the lower track and I think this will be the approximate location for each bridge.


I put the bridges up on temporary supports to help me visualize where the upper loop will be heading.


The lilacs come out around the first week of May here in Spokane. I planted this one a couple years ago and this is its first year blooming.


The native serviceberry (Amelanchier alnifolia) is also in full bloom right now.


Saturday, May 3, 2025

Getting the railroad up and running for spring

Spring is here again and it's time to get the railroad running. This year's report is essentially the same as last year...damage over the winter was pretty minimal with some settling as I'd expect. So time to freshen up the ballast and continue work where I left off.


Spring is definitely here. The native plants are leafing out and the lawn is a bright green.


Adding ballast along a section of new track.


This view shows the main line on the right with new ballast, the connector with the upper loop in the middle, and in the lower-left is the reverse loop for the main line.


Defining a rough outline of the curve on the east end.


Laying track to accurately define the curve. I'm thinking this might make a nice location for a future logging camp.


I put a fair amount of fill here to help keep the track as level as possible.


The finished curve with ballast in place.


Now that the mainline loop is complete, a short train is out for a test run.


Here the test train is crossing a switch at a low spot which I don't think is going to work well. I'll need to come up with a plan to raise the track here.


And now for a slightly longer test train with a little added weight for testing.


This section has also become a little uneven due to differential settling. I'll need to raise the track a bit just ahead of the locomotive.


And here is the test train going around the new curve. The curve is perfect and no issues for now, but I expect settling here will require maintenance next year.


Another view of the low spot. With a longer train you can clearly see it is bottoming out here.


Scene from a recent hike. With the spring weather come all the native wildflowers, including fields of arrowleaf balsamroot (Balsamorhiza sagittata)


A few early silky lupine (Lupinus sericeus) are in bloom now


Heartleaf arnica (Arnica cordifolia)


False Solomon's seal (Maianthemum racemosum)


Common camas (Camassia quamash)


Wednesday, April 3, 2024

Spring maintenance work

With the recent good weather I was able to make some progress on railroad maintenance. As I mentioned in the my last post there was relatively little damage over the winter so it was an easy task to get everything fixed up. I did some minor trestle work a couple of weeks ago and this week I returned to track alignment and ballasting.


This cribbing had dropped and shifted slightly out of place as the fill settled over the winter. I nudged it back where I needed it and then top filled with more ballast to hold the tracks in place.


This short retaining wall had started sliding down the hill so I anchored it using a few wood stakes.


I then back filled with ballast so the tracks are now secure.


Here is a reverse view of the same area.


I'm working on finalizing the alignment of the lines and setting them in place. I think I'm happy with this area and now I just need to join the track securely and add ballast. On the right is the main line. The middle track is the connector between the main line and the upper loop. And the track on the left will allow me to reverse the direction of trains on the main line.


I've finished roofing all three cabins for the railroad maintenance workers as well as the company store where workers can find overpriced organic produce and oversized novelty coffee mugs.


No new flowers in my garden yet so here is a picture from a recent hike of yellow bells (Fritillaria pudica). Locally the native wildflowers are going crazy right now and every time I go out I see something new in bloom.


Thursday, March 21, 2024

Crew housing for PE&A employees

Spring is here and it's time to resume work on the PE&A. Damage over the winter has been pretty minimal. The rock work has settled but is stable and I didn't experience any rock wall failures over the winter. The ballast has settled as I expected it would and, with a few minor exceptions, I can pick up where I left off in the fall.


Ballast has settled into place and I'll need to add more ballast to some sections which I was expecting. Here there was quite a bit of settling and I think the gravel has pulled the cribbing down with it. The track is now floating above the ballast, supported by the end of the trestle which has stayed in place.


This was the biggest surprise. Here the entire slope seems to have slid downhill, taking the small retaining wall with it. Won't be too much work to repair, but I am concerned that the slope may continue sliding. I may want to drive stakes in here to help stabilize the slope


I thought the PE&A workers could use a few crew houses along the line. I found these unfinished wood houses at Joann Fabrics (on sale for about six dollars) and they seemed about the right scale (and price), even if they are marketed as "bird houses." I started off with a coat of primer on all sides.


I tried a brush and latex paint but ended up switching to spray paint as it is so much easier to use on a small object like this with lots of corners. I left the roofs primed but unpainted as I would be covering them with corrugated metal sheets.


For roofing I went with something even cheaper than the houses. Why recycle when you can upcycle? Cans have been rinsed and dried.


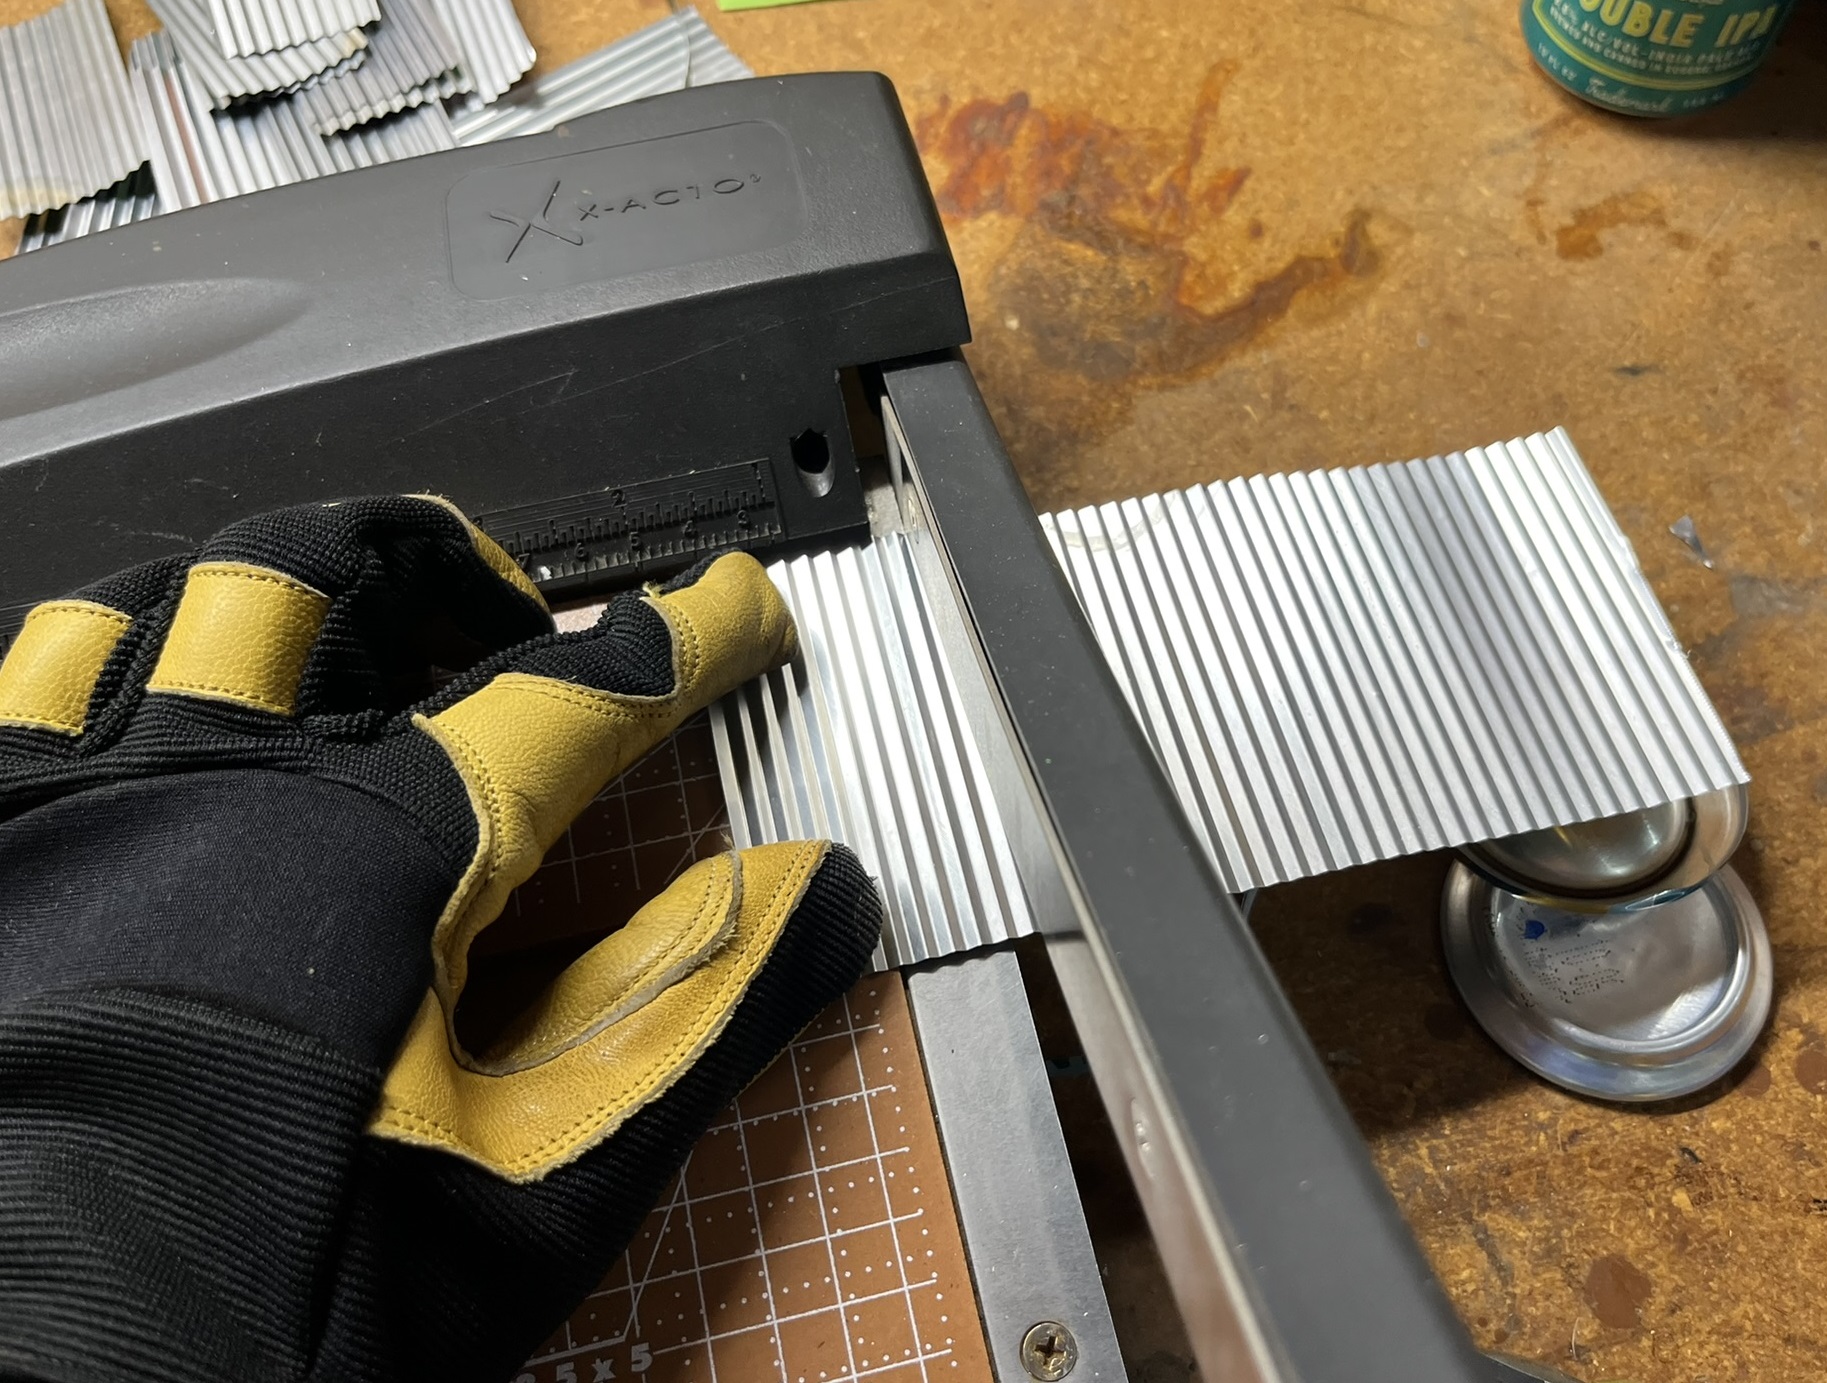
With a pair of tin snips I removed the bottom and top from the can and cut open the cylinder so I had a rough rectangle of aluminum. Leather gloves are a must given all the sharp edges.


After flattening the aluminum along the edge of my workbench, I used a guillotine paper cutter to trim both long edges so the sheet was exactly 3.4 inches wide, then trimmed one short edge so it was perpendicular. I decided that my roofing would be made from 8' x 4' panels of corrugated metal, which in my target scale of 1:29 ends up being 3.4" x 1.7". 


Next step is to corrugate the metal. I'm using a crimper designed for paper that you can get at any craft store.


I then cut the metal sheet into 1.7" wide pieces. Each can produces four pieces.


Several cans later, I taped down all my metal pieces onto a piece of cardboard to hold them steady for painting. I used a combination of a medium gray and a metallic aluminum spray paint to give the pieces a weathered look.


I next used a few colors to try to mimic rusting. This is new for me so the results aren't the best. I think I need to watch some online videos and practice some more. My second batch turned out a little better than this first batch.


Once everything was dry it was just a matter of gluing the panels on the roof and cutting some to size to fit around the chimney.


With more panels on the roof the clamping got a bit creative.


And here is the first completed house set out by the track.


The very first colors are starting to pop up in the yard. Mountain kittentails (Synthyris missurica) are pushing up through the leaf litter.


And this is a new one for me this year. These catkins are the bloom of the Scouler's willow (Salix scouleriana). They are attracting a variety of flying insects which I was excited to see.