Pages

Wednesday, March 27, 2019

Building a retaining wall

One of the projects I'm working on is building a retaining wall along the fence where the track is slightly above the ground but not high enough for a trestle. If I had more room I'd build up the land using rocks and soil, but because this stretch is squeezed in between another track and the fence, a wall is the logical solution. It's actually a double wall that will be filled on the inside with gravel. Only one side is visible to the viewer which I am decorating with cut stone; the other side I'll leave exposed. The slope of the rail along this section is approximately 2.5%.

This is the first of two three-foot sections. The second one will be one inch lower because of the slope. I'm hoping this will look good. A more realistic approach would probably be to build this as six one-foot sections, each one stepping down by 1/3 inch from left to right. But I thought doing this is just two sections would provide greater strength and integrity for the wall, which is my primary concern. And I figure if I don't like it I can always rebuild it.

I started with two three-foot long cedar 1x4s and tied them together using cut sections of treated deck rail posts. Why these materials? Because that's what I found in the garage. I'm hoping between the cedar, treated wood, sealers, and some very good drainage I plan to have in place, that this will stand up to the elements.

Next I checked for placement where this section will be going. Currently the track is being held up here by two five-foot long stringers—which you can see in the background—with wood blocks underneath for support. I should have noticed at this point that it is way too narrow. There's enough room from the trucks to pass but the car bodies could get clipped by the wall edges. 

For the decorative side I'm using a cut stone "tile" from Home Depot which can easily be cut down into strips to fit my wall. The "tile" I settled on has cut stones that are uniform in width and height (1 x 1/3 inch), but varied in their depth. And there's no spacing in between for grout, so it looks like stacked cut stone. Unfortunately some of the pieces are polished which doesn't look realistic, but it's subtle enough that it passes the 10-foot rule (it looks fine to a viewer 10 feet away).

I'm using a regular tile adhesive to adhere the stone to the wood. This is not intended for outdoor use, so I plan on putting an enormous amount of sealer on it and then we'll see how long it lasts.

Once the side pieces had set sufficiently, I added strips of stone along the top edge. I tried cleaning the adhesive off as much as I could but there was still some left. It was around this time that it occurred to me that my structure was too narrow.

I wanted to see how it would look and verify that yes, indeed, it was too narrow. After I widen it, I'll place stone along the top edge of the outer wall, and also along the inside edge of that wall near the top. I don't want any wood visible to the viewer, but don't need to cover most of it as it will be buried in gravel.

A close-up showing the top of the visible side. The excess adhesive was way too visible so I pulled out my Dremel 3000 and cleaned it up in no time.

Here's another view looking down. On the left at ground level is part of an eight-foot diameter curve. I need to be very careful with final placement of the wall to ensure that my longest train cars can still navigate the curve without scraping the wall.

The PE&A isn't the only railroad doing maintenance today. Here's a view from my desk at work of BNSF's Stacy Yard. A lot of noise today as a crew was replacing ties along one of the tracks. 

Sunday, March 24, 2019

PE&A Opens for 2019 season

The PE&A has opened for the 2019 garden railroading season. Last weekend I cleared off the track and did a full inspection to make sure I could run a train. Despite all the snow and downed branches this winter there was surprisingly little damage and less erosion and subsidence than I expected. I think that's a sign that my railroad has settled into place. My primary task was clearing twigs and duff off the track and cutting back a few plants that had grown too close to the right-of-way. I had a locomotive out and running in little time.

This weekend I added some new ballast in spots, but most of the track was fine as is. I think I added half as much ballast as I did this time last year. I pulled out a few more cars and put a train together for a test run. I even pulled out a second locomotive and set up a consist, which worked fine for awhile until one of my two batteries died.

Next up is to start on the projects I thought I was going to get done last year, specifically the installation of the wood trestle, adding permanent piers for the two bridges, cribbing along the trestle approach, and a retaining wall along the back fence. I'll post pictures of those projects as they progress.

 A string of boxcars heads across the bridge.

New ballast in a couple of spots.

I noticed that there was an unexpected dip in this section. So I pulled out about eight feet of track, leveled the ground and then put the track back down. It has a very even slope now.

Alki kept watch over the activities. He is very happy that it is warm enough for him to comfortably stay outside.

I cleaned out the stream bed, which had been messed up in spots by moles over the winter.

A couple of trailing hoppers running through the iris.


Sunday, July 15, 2018

South Cle Elum Rail Yard

Yesterday we visited the South Cle Elum Rail Yard, part of the Iron Horse State Park along the former right-of-way of the Chicago, Milwaukee, St. Paul and Pacific Railroad (Milwaukee Road). The rail yard, depot, roundhouse and other supporting structures were built in 1908–1909 as the railroad was pushing west toward Seattle, the third and last transcontinental railroad to cross the Cascades in Washington.

The depot was built in 1909 and was used until passenger service was discontinued in 1961. It is pretty substantial in size, 132 x 24 feet. Thanks to volunteers it was fully restored and reopened to the public in 2006. The east half of the building houses a restaurant that is open most days of the week, while the west half of the building houses the museum which is usually open a couple days per month between May and October, depending on volunteer availability.

When the Milwaukee Road ceased operations in Washington in 1980 it sold off some of its assets in South Cle Elum, including the bunkhouse which is now a B&B, and three operator houses built in 1920 which are now private residences. But the bulk of the land including the depot and the substation were transferred to the state in compensation for taxes owed. Most of the length of the main route through Washington went to the state as well and became known as Iron Horse State Park on the west side of the Columbia, and the John Wayne Pioneer Trail to the east of the Columbia. Today the entire length of the publicly accessible right-of-way is known as the Palouse to Cascades Trail. With some connecting trails, it is possible to walk the old railroad bed (or ride a bike, or a horse) from the Seattle area to the Idaho border.

The Milwaukee Road was using coal at the time the South Cle Elum yard was built in 1909. But they started converting to oil powered locomotives in 1910. And then started experimenting with electric powered locomotives in 1912. This section through the Cascades was fully electrified by 1920. The Milwaukee Road ended electrification along this section in 1972, and completely abandoned electric locomotives along its entire route in 1974. That year the Milwaukee Road also stopped using South Cle Elum as a division point and the yard was virtually abandoned. It was only a few years later that the Milwaukee Road, in bankruptcy, abandoned its Pacific route altogether.

Today, while the state owns the property and buildings, it heavily relies on local volunteers to tell the story. The Cascade Rail Foundation has been instrumental in ensuring the history of the Milwaukee Road in Washington is not forgotten. They have spent thousands of hours restoring structures, providing interpretation, and operating a museum in half of the restored depot. The yard and extant structures were listed on the National Register of Historic Places in 2003.

The substation is normally closed to the public. But they occasionally open it for guided tours which is why we chose yesterday to visit. If you're interesting in seeing the inside, they'll likely have another tour day in August—check their website for details.

East end of the substation, built in 1919. The concrete structured angled out from the wall was the anchor for the incoming AC high power lines. In the lower left-hand corner you can also see concrete blocks that supported a steel tower for the power lines.

A view of the south side of the substation, showing where DC power would have left the building headed for the catenary over the tracks.

A view inside the north room of the building, looking east. In the lower center part of the building is where high power wires came in, and you can see the wall angled out.

A close-up view, showing original wires that are still in place!

These large doors allowed a railroad flat car to be pushed in, so heavy objects could be transferred directly from the flat car using an overhead crane. 

Both rooms are filled with all sorts of railroad equipment. In the center of the picture is an overhead crane, not original to this building but recovered from another Milwaukee Road substation. The plan is to install it where it would have originally been, in part to provide structural support for the brick walls.

This is a small transfer vehicle that could be pushed along rails between the two large rooms. It's shown on a small turntable allowing workers to rotate the vehicle to go around the corner.

The Milwaukee Road had 22 substations along its route. So why is this one number 24? The substations were numbered sequentially from east to west, and reflected the intent to electrify all the way from Two Dot, Montana to Tacoma, Washington. But there was a gap in eastern Washington that was never electrified, so substations 15–20 were never built.

The remains of the 85-foot turntable can be seen here, with the pivot foundation on the left, and part of the pit wall on the right.

And to the north of the turntable are the remains of the eight-stall roundhouse where locomotives would be serviced. What you see here were the tops of concrete pits where workers would inspect and work underneath locomotives.

These concrete footings are all that remains of the water tower. The wooden tank that sat above this foundation would have held about 50,000 gallons of water.

The only piece of rolling stock currently on site is this bay window caboose built in 1946. The siding is ribbed metal which is unusual and required less metal, creating a lighter car. The Cascade Rail Foundation plans to add more pieces of Milwaukee Road rolling stock over time.

A view inside the depot of the waiting room at the west end of the building and ticket office on the left.

Friday, June 15, 2018

NGRC Atlanta Update 3

To continue to the Atlanta tour, here are some pictures of the garden railroads I toured last Friday.


JD & VR Railroad | Jim and Marylou Foley | Atlanta, GA
JD & VR Railroad: This lovely railroad had a double track running around a small pond and was very well integrated in and with the garden.

JD & VR Railroad: You can easily run two trains at once and could probably operate a third one as well, if you're careful.

JD & VR Railroad:  One train running was a PRR coal unit train.

JD & VR Railroad: Train coming out of the tunnel by a remote water tower.

JD & VR Railroad: View from the back side looking toward the village.

JD & VR Railroad: Access from the layout to the storage area is provided using these beautiful stainless steel bridges.

Appomattox Railroad System | James and Angela Robinson | Riverdale, GA


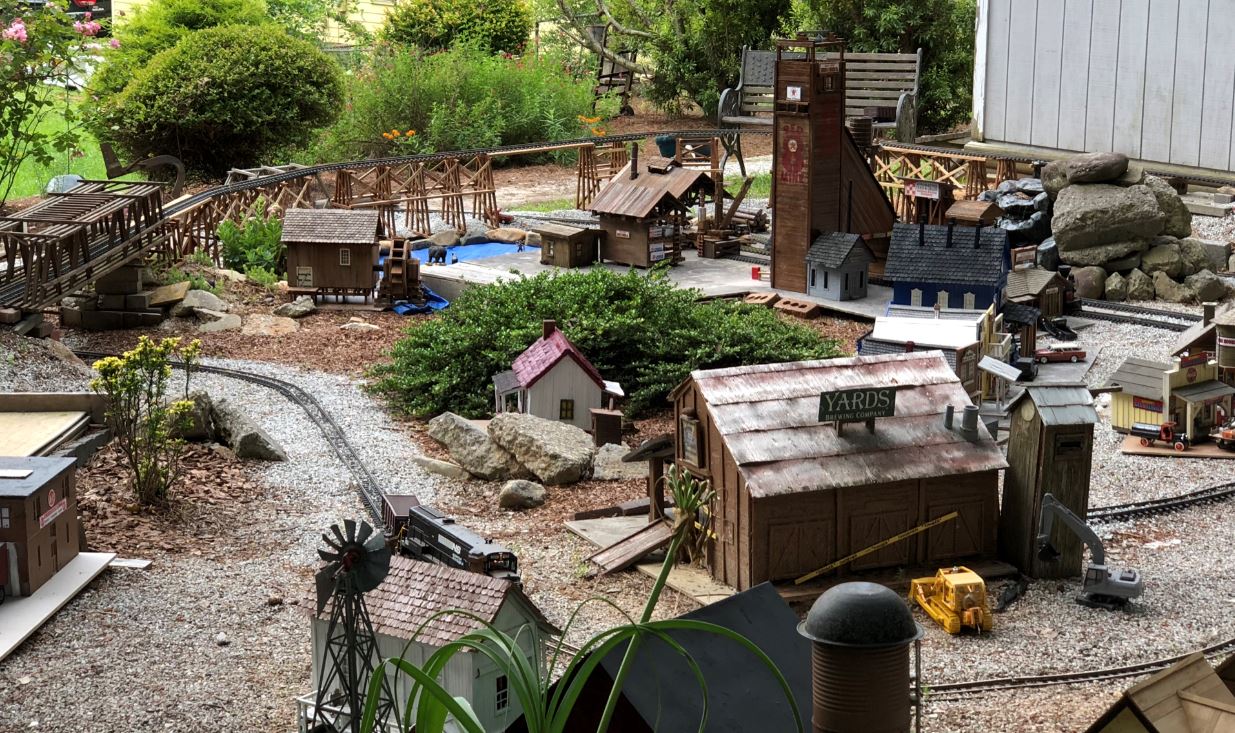
Appomattox Railroad: There are a number of detailed buildings, like this sawmill and mine shaft.


Appomattox Railroad: I really liked this barn-like distillery.


Appomattox Railroad: An overview picture showing many of the buildings and trestles in the background.


Appomattox Railroad: A view of the main depot and siding tracks.

Papa Railroad PRR | Michael Carney | Peachtree City, GA

Papa Railroad PRR: This large railroad uses Digitrax DCC for complete control of all trains on all sections of track, as well as dozens of signal lights and crossings. Here the signal light warns of an occupied block ahead.

Papa Railroad PRR: A monitor near the track provides an overview of the system and indicates which blocks are occupied by trains (red) and which are open (black).

Papa Railroad PRR: My favorite part was seeing two PCCs providing back-and-forth service on a commuter line.

Papa Railroad PRR: Plenty of bridges, tunnels and other features as well.

Papa Railroad PRR: One more picture of a PCC heading out over a bridge. Track in the foreground in the freight mainline.


Elk River Railroad | Norm and Ann Lundin | Newnan, GA

Elk River Railroad: This railroad has three loops that cross over each other.A passenger train is running on the upper track while a BN locomotive idles below.


Elk River Railroad: A Santa Fe A-B-A consist idles next to the village.


Elk River Railroad: An old icing facility on a siding. The roof may be caving in, but it just adds character.


Elk River Railroad: Passenger train is crossing over the lower track.


Alpine Adventure | Jeff and Mary Ann Folk | Newnan, GA

Alpine Adventure: This railroad models the Bernina Express train of the Rhaetian Railway in Switzerland, including the famous Brusio spiral viaduct.

Alpine Adventure: The train cars are models of the actual cars in use today.

Alpine Adventure: Another view of the train showing the locomotive.

Alpine Adventure: The Express pulls out of one of the twin bore tunnels.

Bonus train! Just by chance, we came across this indoor railroad suspended from the ceiling when we stopped for lunch on Friday in Newnan, GA.